Power Source No Output? Here’s How to Troubleshoot and Fix It
Published: Author: Lisa
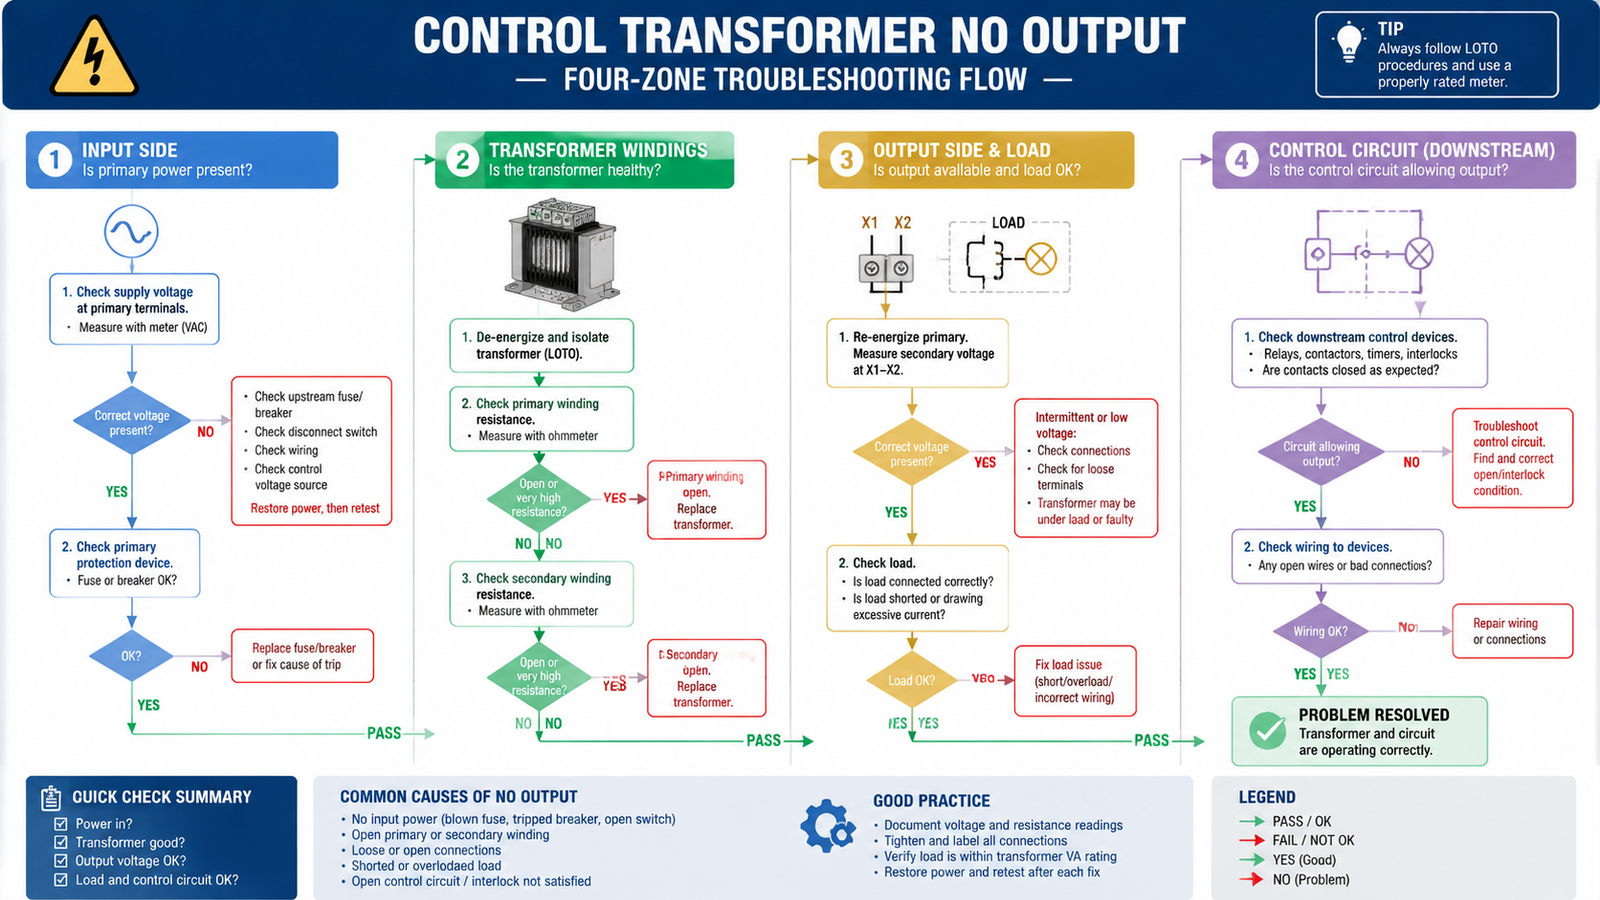
Your machine won’t start, the control panel is dead, and the PLC display is dark. When a control power source stops producing output, the first suspect is almost always the control transformer that steps line voltage down to the 24V, 48V, or 110V your control circuit runs on. The good news: most “no output” failures are caused by a handful of simple, fixable issues rather than a dead transformer. This guide walks you through a systematic check — input side, transformer windings, output side, and control circuit — so you can find the fault, fix it, and get the line running again without swapping parts blindly.
Why Does a Control Power Source Stop Producing Output?
A control transformer has one job: convert line voltage (typically 380V, 480V, or 220V) to a low control voltage that relays, contactors, solenoids, and PLCs can use safely. When the secondary produces nothing, the fault lives somewhere in one of four zones: the supply feeding the primary, the transformer itself, the secondary circuit, or the control devices downstream. Before you open anything, use the quick table below to narrow the hunt.
Symptom
Most Likely Cause
First Check
No voltage at primary terminals
Tripped breaker, blown fuse, or open disconnect
Measure line voltage at the transformer primary
Primary voltage OK, no secondary voltage
Open winding, blown secondary fuse, or shorted load
Continuity test across primary and secondary windings
Transformer hums but outputs nothing
Short circuit on secondary side
Disconnect the load and re-measure secondary voltage
Output appears only when unloaded
Oversized inrush or undersized transformer
Measure voltage under load and compare with nameplate VA
Burned smell or discolored winding
Overload, shorted turns, or insulation failure
Inspect for heat damage, then test winding resistance
Safety First: What to Prepare Before Troubleshooting
Control circuits are low voltage, but the transformer primary is not. Treat every terminal as energized until you prove otherwise. Before you begin:
De-energize the panel, lock out the disconnect, and tag it according to your plant’s lockout/tagout procedure.
Gather a true-RMS multimeter, a clamp meter if available, an IR thermometer, and the electrical drawings for the machine.
Confirm the transformer nameplate rating (input voltage, output voltage, and VA) so you know what readings to expect.
Check for a dual-voltage transformer: on units with multiple primary taps, note the correct tap positions before anything is moved.
Work with the circuit de-energized for all continuity and resistance tests. Only power it back up when you need to verify live voltage readings.
Step 1: Check the Input Side First
Most “no output” calls are input problems wearing a transformer costume. Verify the supply in this order:
Measure voltage at the transformer primary terminals. It must be within ±5% of the nameplate rating. If it reads 0V, the problem is upstream — check the disconnecting means, branch circuit breaker, and any primary fuses.
Inspect primary fuses. A blown primary fuse is one of the most common causes of a completely dead control transformer. Fuses should be rated at least 1.25 times the full-load input current; undersized fuses fail repeatedly under normal inrush.
Verify tap connections. On multi-tap transformers, confirm the jumpers match the actual supply voltage. A transformer jumpered for 480V but fed with 380V will output far below rated voltage — sometimes near zero.
Check wire terminations. Loose or corroded terminals on the primary side cause intermittent or completely absent voltage. Tighten every lug and look for discolored insulation that indicates a high-resistance connection.
If input voltage is present and correct but the secondary is still dead, move to the transformer itself.
Step 2: Inspect the Transformer Windings
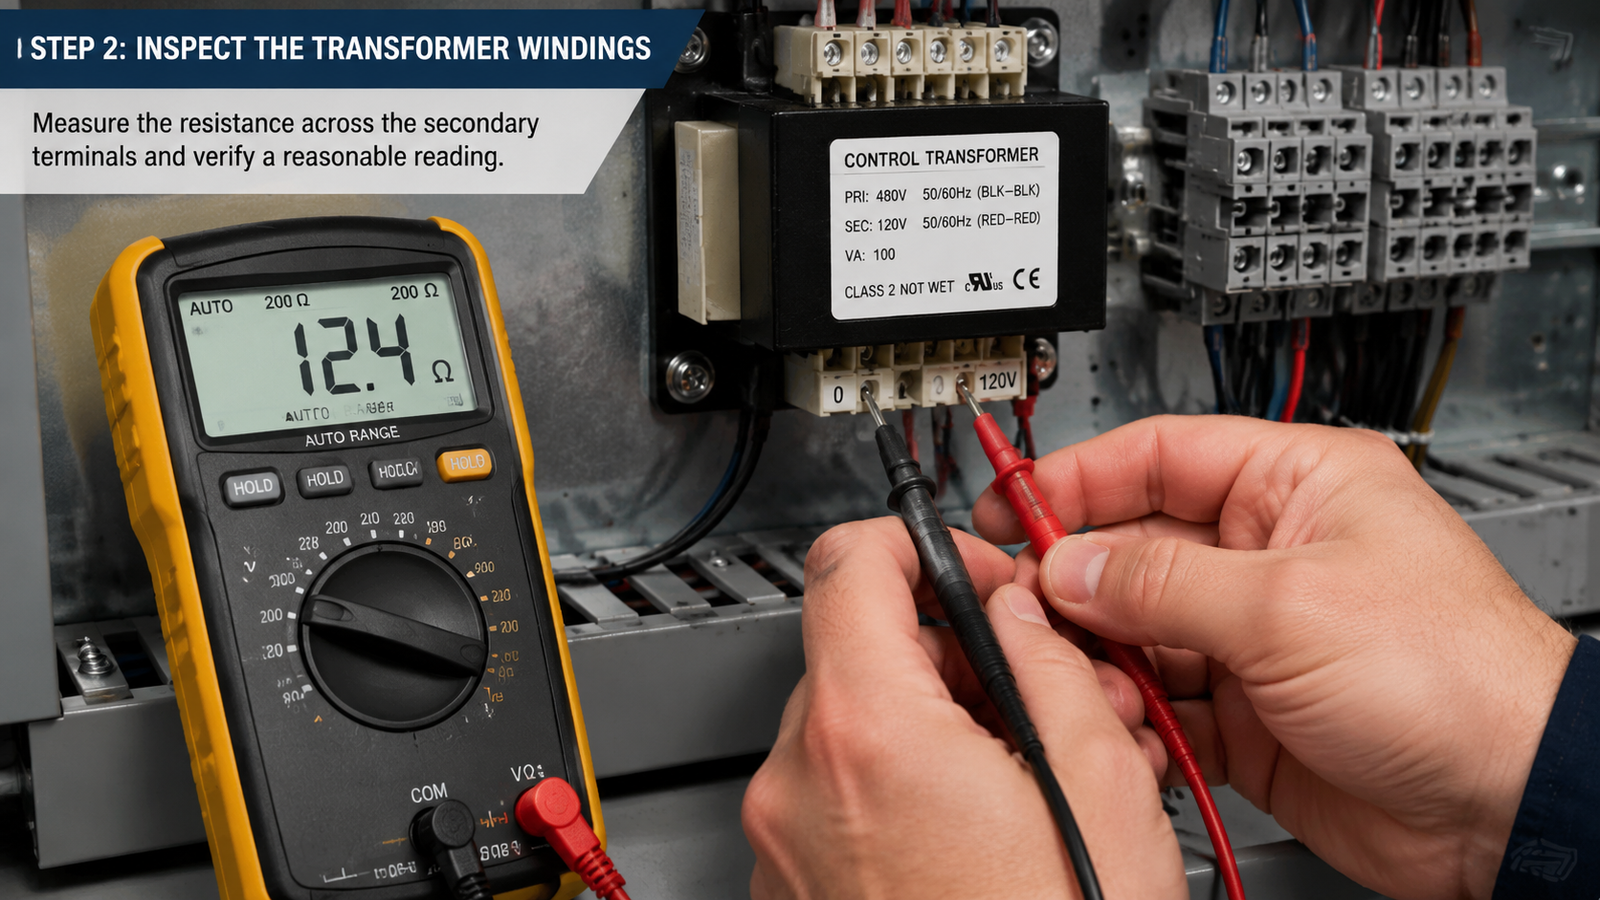
With power off and the transformer isolated, test the windings with your multimeter set to resistance:
Primary winding: Measure across the primary terminals. A healthy winding typically reads a few ohms (roughly 0.5–5Ω depending on rating). An infinite or open reading means the winding is broken — the transformer must be replaced.
Secondary winding: Repeat the test on the secondary terminals. Same expectation: low resistance, not open.
Winding-to-winding short: Check resistance between primary and secondary. It should read open (infinite). A low reading indicates insulation breakdown between windings.
Winding-to-core short: Measure from each winding to the core or frame. Any continuity means the insulation has failed, which can cause erratic output or a tripped upstream breaker.
Also look for physical evidence: dark, brittle insulation, a burnt smell, or melted terminal blocks all point to an internal failure. If the windings test fine, don’t replace the transformer yet — the fault may be on the output side.
Step 3: Check the Output Side and the Load
A perfectly good transformer produces no usable output if the secondary circuit is shorted or its protection is blown:
Test the secondary fuse. If the control voltage fuse is blown, replace it only after finding out why it blew — a shorted control wire or a failed device downstream will simply blow the next one.
Disconnect the load. Measure the secondary voltage with all loads disconnected. If it reads correctly unloaded but drops to near zero when loads reconnect, you have a short circuit in the control wiring or a failed device. Reconnect loads one at a time to isolate the culprit.
Check for voltage drop under load. If the unloaded voltage is fine and the loaded voltage is low (not zero), the transformer is likely undersized for the total inrush demand of your control circuit. Add up the VA of every relay, contactor, and solenoid coil, including simultaneous energization, and compare it with the transformer rating. For heavy inrush duty on machine tools, a BKJ5 control transformer is designed to ride through the energization surge without dropping the control bus.
Verify the X2 grounding bond. Many control circuits reference X2 to equipment ground for safety. A missing or broken bond causes odd voltage readings and can leave control devices unable to pull in.
Step 4: Check the Control Circuit Downstream
If the transformer output is present at its terminals but the control circuit still has no power, the fault is between the transformer and the devices it feeds:
Check the main control breaker or disconnect feeding the control bus.
Inspect terminal strips for loose wires — vibration loosens terminations over time, and a single loose screw kills the whole branch.
Test the coils of the primary control relay or contactor. An open coil draws nothing and reports no output, making the entire downstream circuit appear dead.
Look for damaged or pinched control wiring, especially near wireways, hinges, and cable entry points.
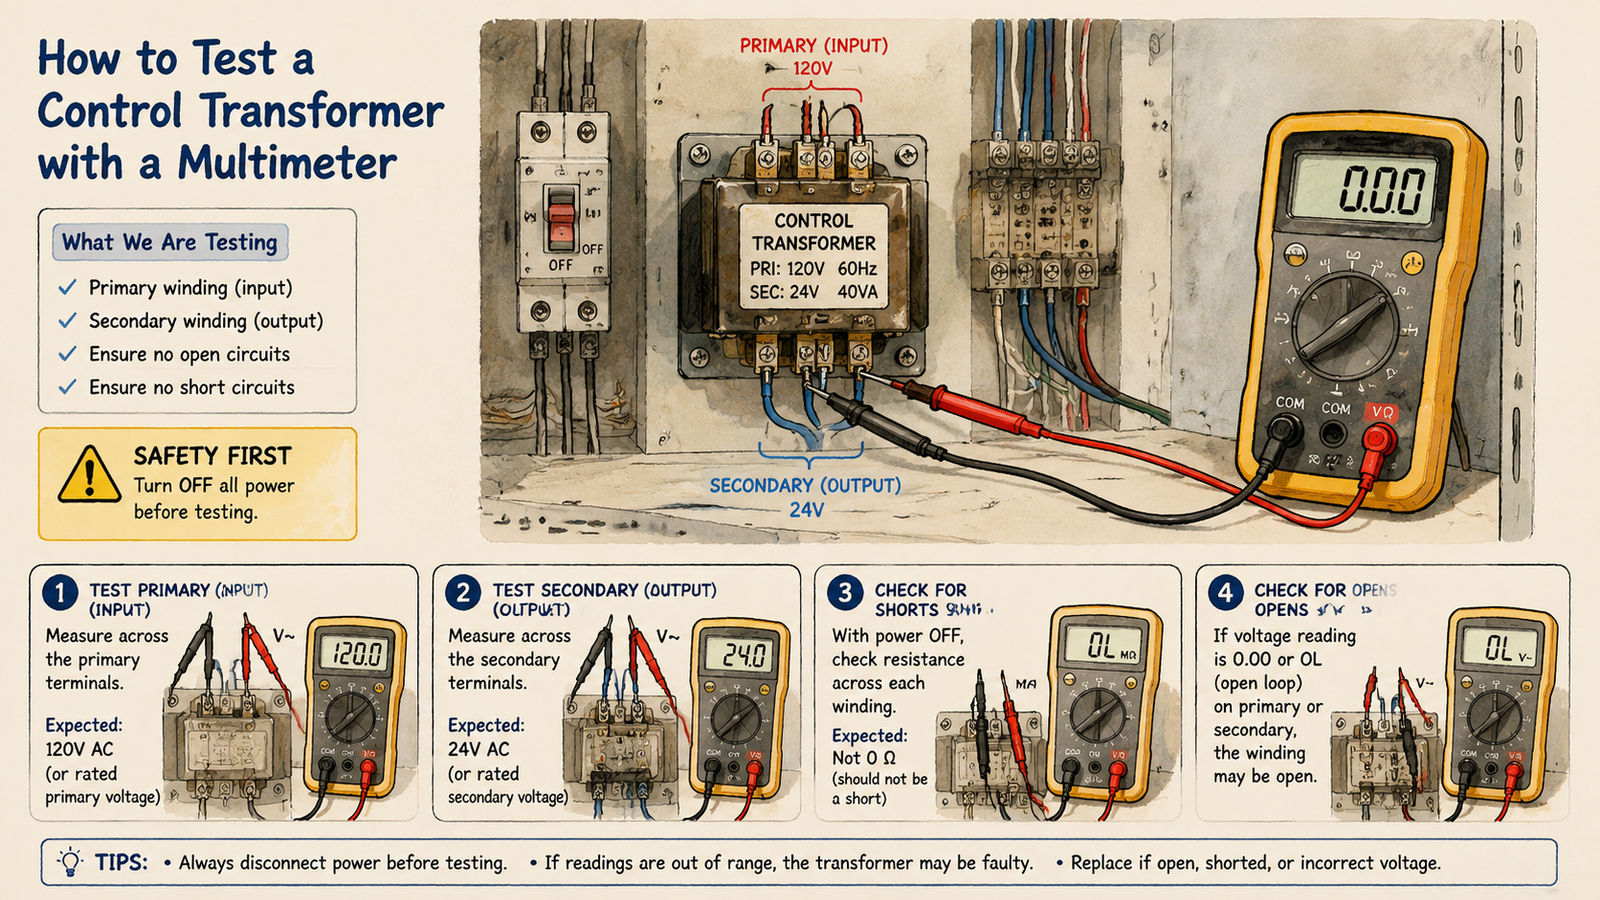
How to Test a Control Transformer with a Multimeter
If you want a single, repeatable procedure, run through this sequence. It takes about ten minutes and covers every zone:
Test
How to Do It
Healthy Reading
Input voltage
Live test, AC volts across primary terminals
Within ±5% of nameplate
Primary winding resistance
Power off, ohms across primary terminals
0.5–5Ω, not open
Secondary winding resistance
Power off, ohms across secondary terminals
Low ohms, not open
Primary-to-secondary isolation
Power off, ohms between windings
Open (infinite)
Secondary voltage, unloaded
Live test, loads disconnected
Nameplate voltage ±5%
Secondary voltage, loaded
Live test, loads connected
Not more than ~10% below no-load value
Record the readings. If the same values appear healthy every time but the machine intermittently loses power, suspect loose terminations or an intermittent short in the control wiring rather than the transformer.
When to Repair vs. Replace a Control Transformer
Control transformers are sealed units — there is no practical field repair for an open winding, shorted turns, or burned insulation. Replacement is the standard answer for internal faults. Repair makes sense only for external issues: replacing a fuse, tightening terminals, reseating a tap jumper, or fixing the wiring around the unit.
Condition
Action
Blown primary or secondary fuse
Replace the fuse after clearing the root cause
Loose or corroded terminals
Tighten or replace terminations
Wrong tap configuration
Reconfigure jumpers to match supply voltage
Open winding, burnt smell, melted insulation
Replace the transformer
Undersized for actual load
Replace with a larger VA rating
When replacement is the answer, match the VA rating to the real load — including inrush — not just to the old nameplate. BK Series transformers cover 50–2500VA for general control duty, while JBK3 units are built for CNC and industrial automation panels where the inrush load is heavy.
How to Prevent Control Power Failures
Most no-output failures are avoidable with basic discipline:
Size the transformer for inrush, not steady-state. Control devices draw several times their holding current at energization. A unit that handles steady load easily can still trip on inrush.
Keep fusing correct. Use the manufacturer’s recommended fuse size, and never replace a fuse with a larger rating to stop nuisance trips — that turns a symptom into a fire risk.
Schedule quarterly visual checks. Look for discolored windings, loose terminals, dust buildup, and signs of overheating; clean and re-tighten as needed.
Monitor temperature. An IR thermometer spot-check during peak load is cheap insurance. A surface temperature more than 50–60°C above ambient deserves investigation.
Record test results. Tracking winding resistance and insulation readings over time reveals gradual degradation before it becomes a sudden failure.
Conclusion
A control power source with no output is rarely a mystery once you work through the zones in order: verify the input, test the windings, check the output protection and load, then inspect the control circuit. In most cases you’ll find a blown fuse, a loose termination, or a shorted load — fixes that take minutes and cost almost nothing. When the transformer itself has failed, replace it with a correctly sized unit and confirm the taps and fusing are right before re-energizing. For a deeper look at connection and installation details, see our control transformer wiring guide for engineers, or contact our technical team with your control voltage specs and we’ll help you pick the right unit for the job.
FAQ
Why is there no output from my control transformer?
Work through the input first: a tripped breaker, blown primary fuse, or wrong tap setting is the most common cause. If input voltage is correct, test both windings for continuity with a multimeter — an open reading means the winding is broken. Then check the secondary fuse and disconnect the load to rule out a short circuit downstream.
How do I test a control transformer with a multimeter?
With power off, measure resistance across the primary terminals (expect roughly 0.5–5Ω, not open), across the secondary terminals (low ohms), and between primary and secondary (should read infinite). With power back on, verify primary voltage within ±5% of nameplate and secondary voltage at the rated value with loads disconnected.
What causes a control transformer to hum but produce no output?
A loud hum with no secondary output usually means a short circuit on the secondary side is dragging the output down. Disconnect the load and re-measure; if voltage returns, isolate the shorted device or wire by reconnecting loads one at a time.
Can a control transformer be repaired, or does it need replacement?
External problems — blown fuses, loose terminals, wrong tap settings, damaged wiring — can be repaired on site. Internal faults such as an open winding, shorted turns, or burned insulation cannot be repaired in the field; the transformer must be replaced with a unit of the correct VA rating.
Why does my transformer blow fuses immediately when powered on?
An instant fuse failure points to a shorted secondary winding or a short circuit in the load, not a normal overload. Check for shorted turns, pinched control wiring, or a failed device before replacing the fuse again.
How often should control transformers be maintained?
Perform a visual inspection quarterly — check for overheating signs, dust, and loose terminals. Test winding resistance and insulation resistance annually and record the values so you can spot degradation trends before failure occurs.
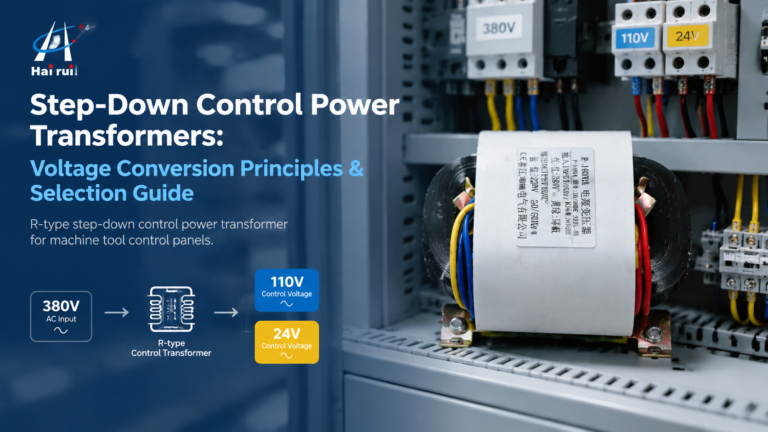
How step-down control power transformers convert 380V/480V line voltage to 110V or 24V control power: turns ratio, VA sizing with inrush, voltage-drop behaviour, wiring and selection.
How three-phase control power transformers work, how to size them for machine tool and control-panel loads, and the delta/wye, standards and protection choices that matter in the field.